Tuesday, December 30, 2008

Christmas Rum Cake

This is my last Christmas dinner post, and I saved the best for last. This cake took the cake. Everyone took a bite and started moaning. My mom was talking about it for days afterward. It's a winner. And there should be no worries about it being too soggy or dry. It's the exact perfect amount of moistness for a rum cake.

Just a few warnings: I made this cake a day ahead of time, and I think that was the perfect amount of time for the glaze to get soaked into the cake. You may risk it being a little on the soggy side if you make it right before serving.
Also, I don't think the rum in the glaze gets hot enough for the alcohol to evaporate, so you might want to check everyone's IDs before serving.
Grease the pan really well. I had a few issues with the pecan topping sticking to the bottom of the bundt pan.

Other than that, this cake is really worth your time and will be enjoyed by all at your next adult gathering!

Pioneer Woman’s Mother-in-Law’s Christmas Rum Cake

source: The Pioneer Woman Cooks

Cake:
1 box yellow cake mix
1 small package INSTANT vanilla pudding mix
4 eggs
1/2 cup cold water
1/2 cup canola oil
1/2 cup rum (dark or light is fine)
1 cup chopped pecans
Brown sugar (optional)

Preheat oven to 325.
Grease and flour Bundt cake pan. Sprinkle nuts over bottom of pan. If desired, sprinkle a couple of tablespoons of brown sugar over the nuts.
Mix all cake ingredients together.
Pour batter over nuts. Smooth out ’til the top is even.
Bake 1 hour, or a little less if the pan is black. Do not overbake!

Glaze:
While cake has ten minutes to go, make the glaze.

1 1/2 sticks (3/4 cup) butter
1/4 cup water
1 1/2 cups sugar
3/4 cup rum

Melt butter in saucepan. Stir in water and sugar. Boil 4 to 5 minutes, stirring constantly. Turn off flame and pour in rum. Stir to combine and reheat for 30 seconds.

Remove cake from oven. Immediately drizzle 1/3 of the glaze on the bottom (top) of the cake. Allow to sit for five minutes.

Invert the cake onto a serving plate. Prick surface a hundred times with a fork (gently, please.) Slowly drizzle remaining rum glaze all over the top of the cake, allowing it to drip down the sides. Cool to room temperature before serving to ensure glaze has soaked in.

Eat. Enjoy. And don’t feel guilty. It’s Christmastime!

Monday, December 29, 2008

No-Knead Dinner Rolls


This was my first successful yeast recipe without using the bread machine to mix the dough. I had told my dad that I was going to try and make the rolls this year, but if I was unsuccessful, he might have to buy some. Lo and behold, I managed to do it. I've realized that if I am patient and don't get myself worked up into a frenzy, dealing with the consistency of the dough is not that difficult. However, I'm more apt to get myself worked up into a frenzy, so we'll see how long this streak of dough success will last.

These rolls were good, though a little on the dense side for my taste. They were delicious just out of the oven with some butter. I took mine out a little early than the cooking time recommended because they were already golden brown. I halved this recipe as well and ended up with 12 rolls plus a little extra dough.

Pioneer Woman's Dinner Rolls
source: The Pioneer Woman Cooks

Ingredients

9 cups flour
1 cup sugar
4 cups milk
1 heaping tsp baking powder
1 scant tsp baking soda
1 cup vegetable oil
2 tbsp salt
2 packages (4 1/2 tsp) active dry yeast

Preparation

Pour 4 cups of milk into a stock pot or Dutch oven. Add 1 cup sugar and 1 cup vegetable oil. Stir to combine. Now, turn the burner on medium to medium-low and "scald" the mixture. Before the mixture boils, turn off the heat. Allow the mixture to cool to warm/lukewarm (90-110 degrees).

When the mixture is the right temperature, add 4 cups flour and 2 packages yeast. Stir together until incorporated. Add another 4 cups of flour. Stir together and allow to sit, covered with a tea towel or lid, for an hour. After about an hour, it should've almost doubled in size. When it has risen sufficiently, add 1 more cup of flour, the baking soda, baking powder and salt. Stir (or knead) to combine.

Butter 1 or 2 muffin pans. Form the rolls by pinching off a walnut-sized piece of dough and rolling it into a little ball. Repeat and tuck 3 balls into each muffin cup. Continue until the pan is full. Cover and allow to rise for 1 or 2 hours.

Bake in a 400-degree oven until golden brown, about 17-20 minutes.

Whiskey-Glazed Carrots

We needed some sort of vegetable for Christmas dinner, and I wanted to do something different from the green beans we had for Thanksgiving. I love carrots, and Joe loves whiskey, so I thought this would be a nice touch of color and flavor to our dinner. I halved the recipe, but I wish I had made the whole thing. The carrots nearly disappeared on the first trip around the table!

Pioneer Woman’s Whiskey-Glazed Carrots

source: The Pioneer Woman Cooks

2 - 3 pounds carrots, peeled and cut into thick circles
1 stick (1/2 cup…1/4 lb) butter
1/2 cup Jack Daniels or other whiskey
3/4 to 1 cup brown sugar
1/2 to 1 teaspoon salt
Freshly ground pepper

Melt 1 tablespoons butter in a large skillet over high heat. Add carrots in two batches, cooking for 60 to 90 seconds each batch. Remove from skillet.
Pour in whiskey and allow to evaporate 30 seconds.
Reduce heat to medium, and add remaining butter.
When butter melts, sprinkle brown sugar over the top.
Stir together, then add carrots to skillet.
Cover, and continue cooking for 5 minutes.
Remove lid and add salt and pepper. Continue cooking until carrots are done and glaze is thick, about 5 more minutes.
Pour onto a platter and serve immediately. Sprinkle with chopped chives if desired

Saturday, December 27, 2008

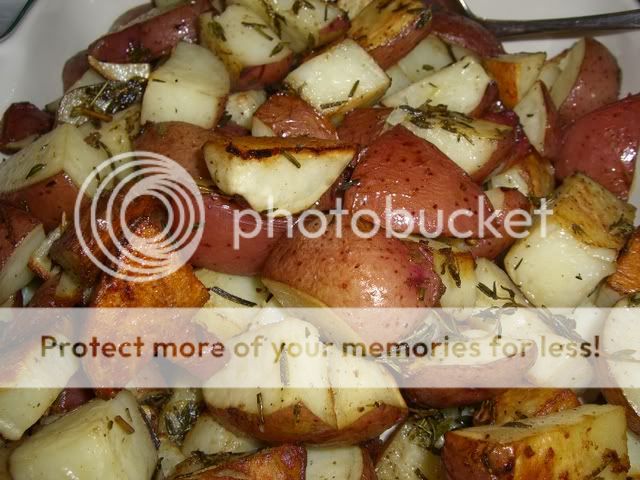
Oven-Roasted Red Potatoes


Instead of accompanying the roast chicken with mashed potatoes, I decided to do oven-roasted potatoes instead. I love red potatoes, especially when they're seasoned with rosemary and thyme and covered with olive oil. These complemented the chicken deliciously, and I don't regret substituting them for mashed potatoes at all.

I cut-up about 8 red potatoes into bite-sized chunks, put them in a single-layer in two 13x9 pans, and tossed them with olive oil to coat and rosemary and thyme. I roasted them in a 425-degree oven for about 20 minutes, tossing occasionally.

Roast Chicken

One of my goals when I began to cook regularly was to get comfortable with roasting a whole chicken. The first time I roasted a chicken, I had some minor problems which involved being unable to find the giblets, cutting open the chicken to find them, and then Joe sewing the chicken back up with a suture kit. Sometimes (but not often) it pays to be married to a doctor. The chicken tasted fine, but it didn't look so pretty.

This time I was prepared. After fretting over what our main entree would be since we did turkey and ham at Thanksgiving and my mom vetoing lamb, beef, duck, or anything more unusual, I settled on a roast chicken. It would be the perfect amount of meat for five of us, and my mom said that she loved roast chicken.


I simply washed it, patted it dry, and rubbed it with olive oil. Then I stuffed the cavity with a quartered lemon and some rosemary and thyme. I also rubbed the breast with a little chopped up rosemary and thyme. I roasted it in a 325-degree oven until the temperature read 170-degrees (about an hour and a half) and then let it rest for ten minutes before carving it.

Everyone was pleased with the chicken, and I took the carcass and bones home and made stock out of them yesterday.

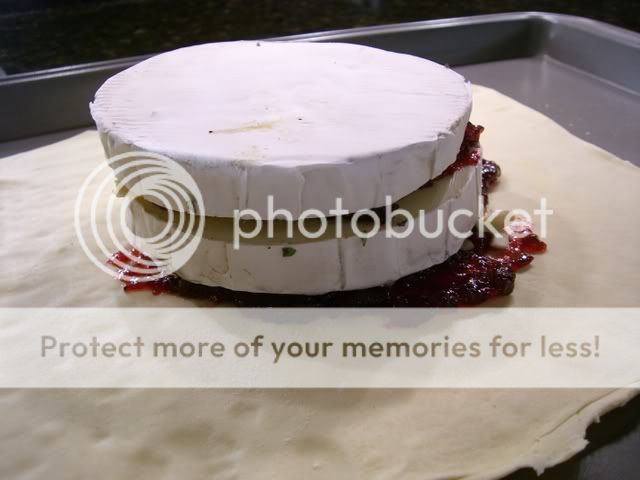
Brie En Croute

I am fortunate enough to come from a family of baked brie fanatics. The first time I had baked brie was at the Breckenridge Brewery many years ago. I fell in love with the creamy cheese in the bread bowl that came with thinly sliced apples for dipping. And when I lived alone, one of my favorite dinners was a few slices of French bread topped with Brie and melted for a few minutes in a warm oven.

So baked brie made an appearance at both Thanksgiving and Christmas as an appetizer and was quickly gobbled up. My dad tends to collect preserves, jams, and jellies, so there is always something delicious open in the refrigerator. At Thanksgiving we used peach preserves, but for Christmas, I decided to try the boysenberry preserves that were open.

I had a minor kerfluffle with the puff pastry as it was stuck together, but that was quickly remedied by rolling it out on a lightly floured surface. My brother made the mistake of going to take a shower shortly after the brie had come out of the oven, and when he was finished, there were only a couple of bites left!


Brie en Croute
  • 1 sheet puff pastry, thawed (follow directions on puff pastry box)
  • 8 oz wheel of Brie
  • fruit preserves
  • slivered almonds
  • 1 egg (optional)
Preheat oven to 350-degrees.

Cut the wheel of Brie in half and spread preserves on cut half. Top with slivered almonds and stack Brie halves on top of each other.

In the center of the puff pastry, spread a layer of preserves slightly larger than the area of the cheese. Sprinkle with slivered almonds and place the Brie on top. Fold up the puff pastry, pinching to seal. Place the puff pastry seam side down on a greased cookie sheet or jelly roll pan. Brush top with egg, if you so choose.

Bake for 20 minutes, or until pastry has puffed and cheese is melted. Serve with crackers or thinly sliced apples.

Friday, December 26, 2008

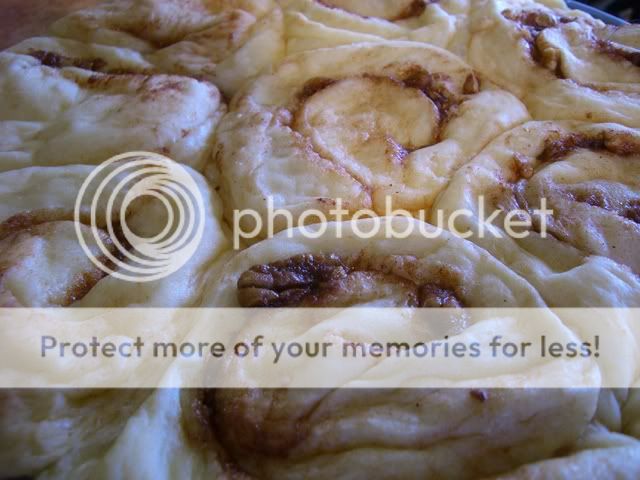
Cinnamon Rolls

Even though Joe wasn't going to be finished being on-call shift until maybe noon, I still wanted to have a special Christmas breakfast, and several women on my cooking board had been talking about cinnamon rolls. Since I had all day of Christmas Eve free, I decided to try my hand at them as well.

I found this recipe that used the bread machine for the initial mixing and rise, and it worked out beautifully. After I rolled it out, covered it with the filling, and cut them into individual rolls, I decided that I would fit them into a 9" round cake pan. I neglected to notice that the rolls would then double. They turned out fine, but they were a little squished.

I refrigerated these overnight and then brought them to room temperature before baking. They turned out wonderfully considering I was worried about the cinnamon rolls taking over my refrigerator while I slept. Coupled with some Trader Joe's gingerbread coffee, these were the perfect Christmas morning treat.


Cinnamon Rolls
source: About.com

Yield: 8 large cinnamon rolls

Ingredients
  • 1 cup milk
  • 1 large egg
  • 4 tablespoons butter or margarine
  • 3 1/3 cups bread flour
  • 3 tablespoons sugar
  • 1/2 teaspoon salt
  • 2 teaspoons active dry yeast or 1-1/2 teaspoons bread machine/ rapid rise yeast
  • Filling:
  • 1/4 cup butter, melted
  • 1/4 cup sugar
  • 2 teaspoons ground cinnamon
  • 1/2 teaspoon ground nutmeg
  • 1/3 cup chopped and lightly toasted nuts
Preparation

Add ingredients to bread machine as recommended by manufacturer. Program maker for the dough cycle. When cycle is done, place dough on floured surface. Knead dough about 1 minute, then let rest 15 minutes. Roll dough into a rectangle, about 15 x 10 inches. Spread 1/4 cup melted butter over dough to within 1 inch of edges, Then sprinkle 1/4 cup sugar, the cinnamon, nutmeg, and chopped nuts evenly over dough. Roll dough up tightly on long side. Press edges to seal and form into a 12-inch long, evenly shaped roll. With a knife or 8 inch long piece of dental floss, cut roll into 1 inch pieces. Place rolls cut side down into a greased 13 x 9 inch baking pan. Cover and let rise in warm, draft free place until double in size, about 30 to 45 minutes.

Bake in preheated 375 degrees F oven for 20 to 25 minutes or until golden brown. Cool in pan on rack for 10 to 15 minutes, then drizzle with powdered sugar icing made by combining 1 cup powdered sugar with 1 to 2 tablespoons milk and 1/2 teaspoons vanilla. Blend until smooth. If too thin or too thick, add more powdered sugar or milk, respectively, until desired consistency is reached. Cut apart and remove from pan.

Wednesday, December 24, 2008

Merry Christmas!


Before I finished cleaning up the kitchen and myself and headed off to church to sing, I wanted to wish all of you a Merry Christmas from Joe, Thelonious, Duke, and me. I will be back after Christmas with a lot of delicious updates.

Christmas Menu

Baked Brie with almonds and apricot preserves

Roast Chicken with rosemary and thyme
Cranberry Salad
Oven-roasted Potatoes
Whiskey-Glazed Carrots
Yeast Rolls
Gravy

Christmas Rum Cake

Tuesday, December 23, 2008

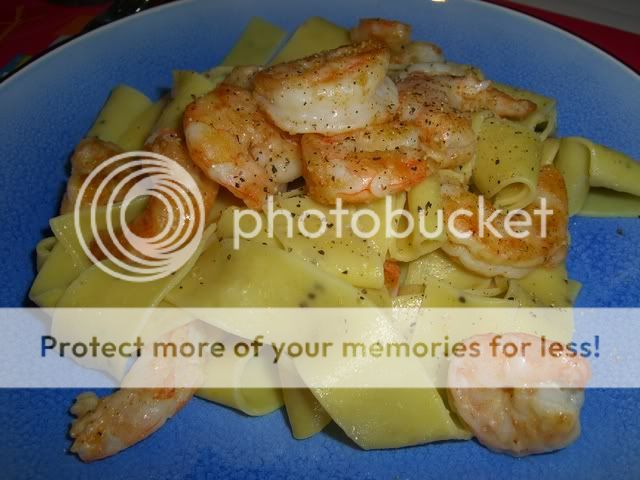
Cajun Shrimp and Lemon Pepper Pappardelle


This dinner was shamelessly stolen from Liz's Cooking Blog. Nashville got a Trader Joe's at the beginning of November, and I couldn't be more thrilled. I have been so impressed by the quality of their products and how "foodie" it is for our budget. After seeing this on Liz's Cooking Blog, I picked up some of this pasta the next time I was there.

This was just as good and quick as I expected it would be. When I opened the dried pasta, I could smell the lemon and pepper. The shrimp were a nice complement and added some protein. When I was in a bookstore yesterday, I saw a cookbook called Cooking with Trader Joe's. This would be a great addition to that cookbook!

Ingredients

1 lb shrimp, peeled and deveined
8 oz package Trader Joe's Lemon Pepper Pappardelle Pasta
2 tbsp olive oil, divided
juice of 1/2 a lemon
2 tbsp flour
Cajun seasoning, to taste
salt and pepper, to taste

Preparation

Prepare water to boil for pasta.

Toss shrimp with flour, Cajun seasoning, and salt and pepper. Heat 1 tbsp olive oil in a skillet.

Put pasta in boiling water and cook for 8 to 10 minutes, until al dente.

Cook shrimp in skillet until opaque.

When pasta is cooked, drain in a colander and return to pot. Add shrimp, lemon juice, and 1 tbsp of olive oil and toss. Serve with freshly ground pepper to taste.

WC Recipe Exchange: Santa Surprise Cookies


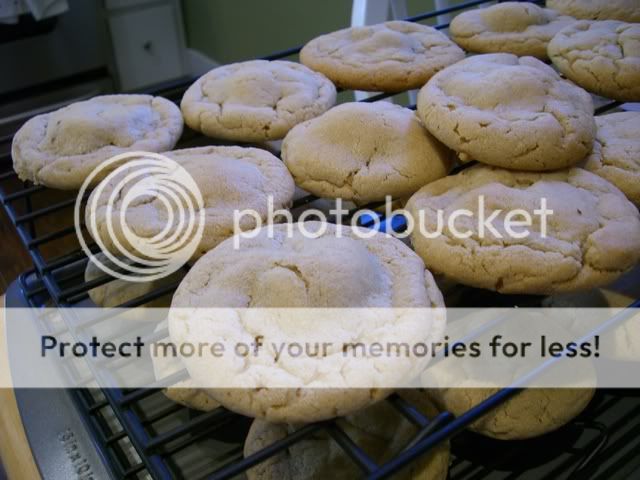
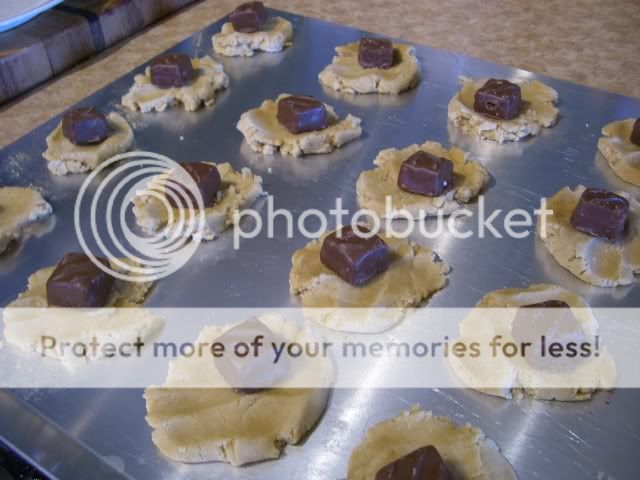
These cookies are intense - basically mini-Snickers baked inside a peanut butter cookie. It's kind of like a deep-fried Oreo; you wonder whoever thought up such a thing, and it might strike you as somewhat disgusting and over-the-top and yet SO GOOD. I was a little worried about the logistics, so I detailed the wrapping of the dough around the Snickers photographically.

I've also added to the recipe to make it a little more clear. The original recipe says to bake them at 300-degrees, but that would've taken hours, so I baked them at 350-degrees, and they turned out perfectly. The dough gets really sticky if it gets warm, so just stick it back in the fridge for a few minutes if it starts to warm up.

Santa Surprise Cookies
source: WC Recipe Exchange

Ingredients

2 sticks butter, softened

1 cup creamy peanut butter

1 cup light brown sugar

1 cup sugar

2 eggs

1 tsp. vanilla

3 ½ cups all-purpose flour

1 tsp. baking soda

½ tsp salt

1 pkg (13 oz) snickers minatures


Preparation

Combine butter, peanut butter and sugar using mixer on medium until light and fluffy.


Slowly add eggs and vanilla until totally combined. Then mix flour, salt and baking soda.


Cover and chill 2-3 hours


Unwrap snickers – and sneak one for a taste test. (Or not, because I used every single last Snickers!)


Take chilled dough and divide into 1 tbsp. pieces and flatten.


Place snickers in center of flattened dough and form dough into ball around the snickers.


Place on greased cookie sheet and bake at 350 degrees for 10 to 12 minutes. (May take up to 15 min.)


Let cool on cookie sheet for 5 minutes and then remove to rack to cool completely. Store in an airtight container.


You can also sprinkle with powdered sugar and/or drizzle with chocolate for an added treat.

Sunday, December 21, 2008

Cranberry Orange Muffins


It's no secret that I have a weakness for healthier muffins. Especially during the busy holiday season, it's helpful to have a breakfast that you can grab as you head out the door. These are similar to the bread I recently made, but the addition of oatmeal gives it a heartier breakfast taste. The orange isn't as pronounced in these muffins, but it is still there. I could imagine these muffins being served as part of a light breakfast or brunch on Christmas morning. I like to eat one with another one of my favorite seasonal treats, clementines.

Cranberry Orange Muffins
source: The Way the Cookie Crumbles

Makes 12 muffins

Ingredients

1 ½ cups whole wheat flour
¾ cup quick-cooking rolled oats
¼ cup buttermilk powder or nonfat dry milk
2 teaspoons baking powder
1 tablespoon orange zest (finely grated orange peel)
½ teaspoon salt
1 cup fresh or frozen cranberries, chopped
½ cup chopped pecans or walnuts (optional)
2 large eggs
⅔ cup (4.67 ounces) sugar
¾ cup milk
⅓ cup melted butter or vegetable oil (I substituted unsweetened applesauce.)

Glaze
2 tablespoons orange juice
3 tablespoons sugar

1. Adjust oven rack to middle position and heat oven to 350 degrees. Spray standard muffin tin with nonstick vegetable cooking spray.

2. Whisk flour, oats, milk powder, baking powder, and orange zest in a large mixing bowl. In a separate mixing bowl, whisk egg until broken up. Add sugar and whisk until combined. Whisk in butter (or oil) and milk.

3. Add cranberries and nuts, if using, to dry ingredients and stir to combine. Add milk mixture and fold with rubber spatula until batter comes together. Do not overmix.

4. Divide batter among 12 muffin cups. Bake until toothpick inserted into center of muffin comes out clean, 18-20 minutes. Cool in pan 5 minutes, then transfer them to a rack.

5. If using glaze: In a small saucepan or the microwave, stir together the glaze ingredients. Bring just to a boil, to dissolve the sugar. Dip the tops of the warm muffins into the glaze.

Oatmeal, Chocolate Chip, and Pecan Cookies

I don't normally take things like cookies and cakes and look for healthier recipes. If I'm going to indulge, I'm going to indulge. But when I was flipping through back issues of Cooking Light, I found these cookies and just so happened to have all the ingredients in my pantry. I made some slight changes, recorded below, based on suggestions from the reviews on the Cooking Light website.

As a warning, these are not really drop cookies as the recipe advertised. The dough is pretty dry and crumbly, but it isn't difficult to roll into balls. The cookies came out perfectly with crisp outsides and chewy insides. These would be great cookies to leave out for Santa and his reindeer, especially if Santa (*ahem* Dad) really likes pecans.

Oatmeal, Chocolate Chip, and Pecan Cookies
adapted from Cooking Light, December 2007

Ingredients

1 1/4 cups all-purpose flour
1 cup regular oats
3/4 tsp baking powder
1/2 tsp baking soda
1/2 tsp salt
1/2 cup granulated sugar
3/4 cup brown sugar
1/3 cup butter, softened
1 1/2 tsp vanilla extract
1 large egg
1/4 cup chopped pecans, toasted
1/2 cup semisweet chocolate chips

Preparation

Preheat oven to 350°.

Lightly spoon flour into dry measuring cups; level with a knife. Combine flour and next 4 ingredients (through salt), stirring with a whisk; set aside.

Place sugars and butter in a large bowl; beat with a mixer at medium speed until well blended. Add vanilla and egg; beat until blended. Gradually add flour mixture, beating at low speed just until combined. Stir in pecans and minichips. Drop dough by tablespoonfuls 2 inches apart onto baking sheets lined with parchment paper. Bake at 350° for 12 minutes or until edges of cookies are lightly browned. Cool on pans 2 minutes. Remove cookies from pans; cool on wire racks.

Yield: 3 dozen cookies (My cookies were bigger and made about 2 dozen.)

Wednesday, December 17, 2008

Easy Mac & Cheese


This recipe has saved me from a lifetime of mediocre homemade macaroni & cheese. All of the recipes I tried previously turned out watery and tasteless in comparison to this. Plus, it's practically as easy as making the stuff from the box! I added in chopped ham and broccoli to make it a whole meal, but this would be great as a side for pulled pork sandwiches or anything else really. I'm so glad I have found a go-to mac & cheese recipe. No more Kraft Mac & Cheese for me!

Easy Mac & Cheese
source: Cate's Kitchen adapted from Cooking Light, May 2007

Ingredients

1 1/4 cups uncooked macaroni
1 cup 1% milk
2 tbsp all purpose flour
1 1/4 cups shredded sharp cheddar cheese
1/2 tsp salt
a few grinds of a pepper mill

Directions
Cook pasta in a medium saucepan according to package directions. (I threw in the broccoli for the last few minutes of the pasta-cooking time.)
Transfer to a colander.
In the same saucepan, combine the milk and flour over medium heat, stirring with a whisk.
Cook, stirring constantly until thickened (about 2 minutes).
Add cheese, salt, and pepper, and continue whisking until all the cheese is melted.
Turn off heat, stir in the pasta, and let sit for a few minutes before serving.

Crustless Quiche


After Thanksgiving, my parents gifted us with some leftover ham. Because life has been so crazy, I had almost completely forgotten about it until I realized I need to use it up quickly before it went bad. Since I don't normally eat a lot of ham, it's always difficult for me to come up with ways to use it that also fit into my schedule. A quiche is perfect, and since we're all (or at least I am) stuffed on cookies, cut out the crust and save some calories.
Had I had time or the energy to run to the grocery store or cook another dish, I would have served this with a green salad and/or some tomato basil soup. Whenever I would eat at La Madeleine, I would always get quiche and tomato basil soup, so they go together perfectly in my mind. This would also make a nice addition to a brunch. It's kind of like a big frittata, except baked the whole time. You could also probably do this in a cast iron pan. In fact, that's probably a brilliant idea.

Crustless Quiche

source: Cooking Up Memories

Ingredients

4 eggs
1/2 cup AP flour
3/4 tsp baking powder
1/4 tsp salt
1 cup milk
1/2 cup cream
3 tablespoons melted butter
1 1/2 cups grated cheese (This was great for cleaning out the cheese drawer. I used a mix of mozzarella, cheddar, and Mexican cheese.)
3 cups ham, corn, asparagus, mushrooms or whatever you have on hand (I used leftover ham, frozen peas, and frozen corn)

1. Whisk together eggs, flour, salt, baking powder, milk, cream and butter.
2. Stir in filling and cheese.
3. Pour into greased pie plate.

4. Bake at 350 for 50-60 minutes

Tuesday, December 16, 2008

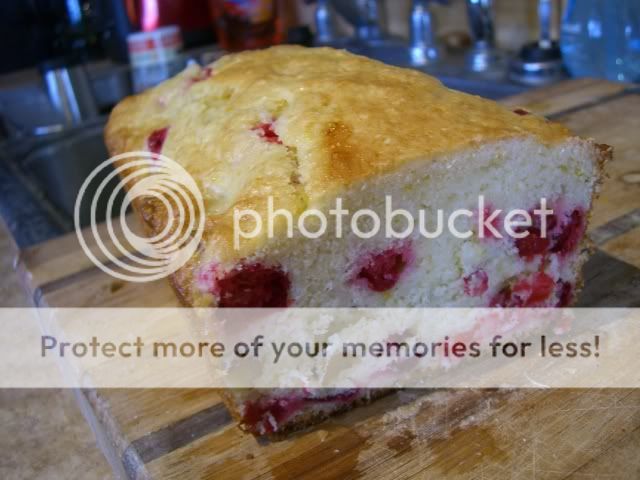
Cranberry Walnut Bread


I bought some fresh cranberries on sale the week of Thanksgiving and have been keeping them in my freezer until I figured out what to do with them. I have slowly been collecting recipes that call for fresh cranberries instead of dried and decided to make this one last Friday during my mid-exam baking frenzy. The tartness of the cranberries and orange flavor make this bread a great contrast in flavor to other heavier baked goods that might be around this time of year. It's a great morning pick-me-up or good for a snack on a gloomy day.
I liked that it's not as sweet or greasy as other quick breads and doesn't contain a lot of fat. Joe really liked this bread a lot, and I'm sure you will too!
Cranberry Walnut Bread
Ingredients
2 c. all purpose flour
1/2 c. granulated sugar
1 Tbsp baking powder
1/2 tsp salt
2 tsp grated orange zest
2/3 c. juice from an orange
2 eggs, lightly beaten
3 Tbsp unsalted butter, melted
1/2 c. shelled walnuts, coarsely chopped
1 1/4 c. fresh cranberries
Directions
-Preheat oven to 350 degrees and prepare a standard loaf pan.
-In a small mixing bowl, combine orange juice, eggs, butter, and stir to combine thoroughly; set aside.
-In large mixing bowl, sift together flour, sugar, baking powder, and salt.
-Add orange zest and stir to combine.
-Add wet ingredients to well in dry ingredients and mix until just combined (don't over mix).
-Fold in walnuts and cranberries and transfer mixture to prepared loaf pan.
-Place into oven and bake until knife inserted into center comes out clean, about 50-55 minutes.
-Remove bread from oven and cool in pan for 15 minutes.
-Remove from pan and cool completely on wire rack.
-Wrap and put away for 1 to 2 days before serving.

Peanut Butter Blossoms

If you can possibly believe it, I did not like peanut butter as a child. It was too goopy and stuck to the roof of my mouth and got inbetween my teeth. It wasn't until I went to boarding school and started eating peanut butter on bananas to avoid the awful cafeteria food that I began to like peanut butter.

These are such a classic cookie that it's hard not to like them. I made them after taking half of my finals, and the act of rolling the dough into little balls was so calming and mindless after my brain had been fried. I served these on Saturday night when we had a few people over before going out to dinner.

The recipe states that it makes about 4 dozen cookies, but I only got 3 dozen out, most likely because I rolled them a little larger than recommended. I waited until I had a count to unwrap the Hershey's Kisses, saving me from having some unwrapped kisses with no cookies to go on.

Peanut Butter Blossoms
(source: Hershey's Kitchens)

Ingredients

48 Hershey's Kisses
1/2 cup shortening
3/4 cup creamy peanut butter
1/3 cup granulated sugar
1/3 cup packed light brown sugar
1 egg
2 tablespoons milk
1 teaspoon vanilla extract
1-1/2 cups all-purpose flour
1 teaspoon baking soda
1/2 teaspoon salt
granulated sugar

Directions

1. Heat oven to 375°F. Remove wrappers from chocolates.
2. Beat shortening and peanut butter in large bowl until well blended. Add 1/3 cup granulated sugar and brown sugar; beat until fluffy. Add egg, milk and vanilla; beat well. Stir together flour, baking soda and salt; gradually beat into peanut butter mixture.
3. Shape dough into 1-inch balls. Roll in granulated sugar; place on ungreased cookie sheet. 4. Bake 8 to 10 minutes or until lightly browned. Immediately press a chocolate into center of each cookie; cookie will crack around edges. Remove from cookie sheet to wire rack. Cool completely.

About 4 dozen cookies.

Friday, December 12, 2008

Baked Chicken Parmesan with Spaghetti Squash Marinara


I'm currently in the midst of finals, so my level of functioning is pretty low right now. I've got that glazed look in my eyes, and I know it's a good day if I've brushed my hair. This all means that it's a good time for some comfort food. I picked up a spaghetti squash from the store last week with no solid plans of what I might do with it; it just interested me. When I saw I had some chicken breasts in the freezer, I had the idea that I could serve the spaghetti squash as a side for chicken parmesan. Whenever I have chicken parmesan, I don't like having pasta as the side. It's just a little to carb-y for my taste. And in the middle of winter, salads don't have the same appeal that they do when it's 90-degrees outside.

So I put the spaghetti squash in the oven whole for an hour at 375-degrees and then cut it in half, scooped out the seeds, and shredded it with a fork. Joe is such a good sport and didn't even look at me sideways when I told him what we were having. He ended up liking it too.

This is a very basic, simple recipe for chicken parmesan. It's definitely not the best in the world, but it does the trick.

Baked Chicken Parmesan
source: southernfood.about.com

Ingredients
  • 4 boneless chicken breasts, pounded to 1/2 inch thickness (I put mine between wax paper and bang the hell out of 'em with a rolling pin.)
  • 1 egg
  • 1/2 cup milk
  • seasoned bread crumbs (Make your own or use the ones out of a can. I don't care!)
  • 2 to 3 tablespoons olive oil
  • 8 slices mozzarella cheese, or more (I usually use shredded cheese because that's what I have in the house usually.)
  • 1 jar (16 oz) spaghetti sauce (A basic marinara works best. If you have homemade, that's preferable.)
  • Parmesan cheese
Preparation

Whisk together the egg and milk. Dip the chicken breasts in milk and egg mixture and then in bread crumbs. Heat olive oil in a large skillet over medium-high heat. Brown the chicken in the hot oil on both sides until golden, about 3 to 4 minutes on each side. Set chicken in a baking dish.

Slice 8 pieces of mozzarella cheese and put two on each chicken breast. Pour 1 jar of your favorite spaghetti sauce over all. Sprinkle with Parmesan cheese and a little more mozzarella and bake at 350° for about 25 to 30 minutes, or until bubbly. Serve with spaghetti, garlic bread and a nice green salad.

Tuesday, December 9, 2008

A Tale of Two Brownies

To celebrate all that we had accomplished that semester (3 papers, 2 exams, and 15 books read), my pastoral care and theology class had a party during part of our last class this past Thursday. After seeing Ginger Brownies on Reservations Not Required, I thought that this party would be the perfect opportunity to make them. Ginger is one of my favorite flavors, and I liked the idea of jazzing up regular brownies with a little unexpected flavor.

But Joe always gets a little sad when I make baked goods and then whisk them away before he gets to eat his fill, and I had been eyeing a brownie recipe in a cookbook that I rediscovered on my shelf that looked like a great go-to brownie recipe, so I decided to make a batch of those and throw in some walnuts for Joe and me to have.

Both brownies turned out really well. I guess it was the recipe I was using before, but my previous brownies always looked ugly and were too fudgey for my taste. Joe preferred the pure chocolate taste in the regular brownies on a blind taste test, but I really enjoyed the ginger brownies. I was curious to see, besides the added flavors in the ginger brownies, how the different amounts of the basic ingredients affected the brownies. Using more chocolate in the classic brownies definitely made them fudgier, and they had a more pronounced chocolate feel in the mouth.

Ginger Brownies
source: Reservations Not Required
Makes 16
  • 1/2 cup (1 stick) unsalted butter, plus more for baking dish
  • 3 ounces bittersweet chocolate, coarsely chopped
  • 1 cup sugar
  • 2/3 cup all-purpose flour
  • 1/4 cup unsweetened Dutch-process cocoa powder
  • 2 large eggs
  • 1 teaspoon grated peeled fresh ginger
  • 1/2 teaspoon pure vanilla extract
  • 1/2 teaspoon ground nutmeg
  • 1/2 teaspoon ground ginger
  • 1/4 teaspoon coarse salt
  • 1/8 teaspoon ground cloves
  1. Preheat oven to 325 degrees. Butter an 8-inch square baking dish. Line bottom with parchment paper, allowing 2 inches to hang over 2 sides. Butter parchment; set aside. Melt butter and chocolate together in a medium saucepan over medium-low heat, stirring until smooth. Remove from heat, and stir in remaining ingredients.
  2. Pour batter into prepared dish. Smooth top with a rubber spatula. Bake until a cake tester inserted into center comes out with moist crumbs, 30 to 35 minutes. Let cool in pan on a wire rack 15 minutes. Lift out, and let cool completely on rack. Cut into sixteen 2-inch squares. Brownies can be stored in an airtight container at room temperature up to 4 days.
New Classic Brownies
source: Alice Medrich's Cookies and Brownies
Yields 16 brownies

Ingredients
8 tbsp unsalted butter
4 oz unsweetened chocolate
1 1/4 cup sugar
1 tsp vanilla extract
1/4 tsp salt
2 large eggs
1/2 cup all-purpose flour
2/3 cup walnut or pecan pieces (optional)

Preparation

Preheat the oven to 400-degrees F. Position a rack in the lower third of the oven.

Melt the butter with the chocolate in the top of a double boiler or in a medium heatproof bowl set in a pan of barely simmering water. Stir frequently until the mixture is melted and smooth.

Remove the top of the double boiler (or the bowl) from the heat. Stir in the sugar, vanilla, and salt. Add the eggs, one at a time, stirring until each is incorporated before adding the next. Stir in the flour and beat with a wooden spoon until the batter is smooth and glossy and comes away from the sides of the pan, about 1 minute. Stir in the nuts, if using. Scrape the batter into the pan. Bake for 20 minutes, or until the brownies just begin to pull away from the sides of the pan. The surface of the brownies will look dry but a toothpick inserted in the center will still be quite gooey.

When cool, slide a knife between the pan and the brownies on the unlined sides. Lift the ends of the parchment or foil liner and transfer the brownies to a cutting board. Cut into 16 squares. May be stored, airtight, for 2 or 3 days.

Thursday, December 4, 2008

Curried Chicken with Apples

This may not be the most attractive meal I've ever made. I'm aware it's a bit brown, but it really is quite good. I've realized I am really liking fruit in savory contexts, so when I saw this curry with apples, I thought it was a great fall/winter meal. My mom came over last night for dinner before the Vanderbilt basketball game and liked this as well. I threw in some raisins on a whim because I thought they would add a nice textural contrast. The sauce thickened up nicely and went well with the brown rice.

Curried Chicken with Apples
source: Casual Kitchen

Ingredients:
1 pound ground chicken (The original recipe called for cubed or ground pork. You could also use cubed chicken.)
3 tablespoons olive oil
2 apples, peeled, cored and chopped (I used one Fuji apple and one Granny Smith)
1/2 cup chopped onion
2 tablespoons flour
1 to 2 teaspoons curry powder, to taste
1/4 teaspoon salt
1/2 teaspoon ground ginger
1/2 teaspoon garlic powder (or one clove garlic, pressed or minced)
2 cups chicken broth
1 tablespoon lemon juice

Directions:
1) Brown the cubed pork on all sides in oil, on high heat, in a large non-stick pan, about 4-5 minutes.
2) Turn heat down to medium-high. Add apples and chopped onions to the pork. Saute for 4-5 minutes, until starting to brown lightly. Add flour and dry spices, stir well and continue sauteing for another 1-2 minutes.
3) Add remaining ingredients, cover and simmer for 35 minutes. Serve with rice.

Serves 4.

Wednesday, December 3, 2008

La Bamba Casserole


I'm sure by now it's no secret that Joe and I really enjoy meals with a Mexican flavor profile, and I really like Cooking Light recipes, so the best thing is when they're combined! I liked this Mexican casserole much better than the Rachel Ray Mexican Lasagna, and it's better for you too. The refried beans are a nice touch and make the whole thing taste much richer than it is.

Oh, and I turned on the broiler for a few minutes at the end of cooking because Joe's favorite part of casseroles is the crunchy cheese.

La Bamba Casserole
source: Cooking Light

Ingredients
  • 1 (5.25-ounce) can whole green chiles, drained
  • Cooking spray
  • 1 pound ground turkey breast
  • 1 cup chopped onion
  • 2 teaspoons chili powder
  • 1/2 teaspoon ground cumin
  • 1/4 teaspoon salt
  • 2 garlic cloves, minced
  • 1 (10-ounce) can diced tomatoes and green chiles, undrained (like Rotel)
  • 2 cups frozen whole-kernel corn, thawed
  • 1 (16-ounce) can fat-free refried beans
  • 1 1/2 cups (6 ounces) shredded cheddar cheese
  • 1 cup chopped tomato (I omitted)
  • 1/2 cup chopped green onions
Preparation

Preheat oven to 375°.

Cut green chiles in half lengthwise. Arrange chiles in a single layer in an 8-inch square baking dish coated with cooking spray.

Heat a large nonstick skillet coated with cooking spray over medium-high heat. Add turkey, onion, chili powder, cumin, salt, and garlic; sauté 5 minutes, stirring to crumble. Add diced tomatoes; cook 5 minutes or until liquid evaporates.

Spoon turkey mixture over chiles. Top with corn. Carefully spread beans over corn. Sprinkle cheese over beans. Bake at 375° for 30 minutes. Let stand 5 minutes; top with chopped tomato and green onions.

Yield: 6 servings

Calories: 344 (28% from fat), Fat: 10.7g (sat 6.3g,mono 2.9g,poly 0.8g), Protein: 32.2g, Carbohydrate: 30.7g, Fiber: 7.4g, Cholesterol: 77mg, Iron: 3.2mg, Sodium: 902mg, Calcium: 269mg

Sunday, November 30, 2008

Spicy Crockpot Beans

I hadn't used my crockpot in far too long, and since Joe was post-call and asleep, I thought this would be a good meal to let cook while I did some studying. Next time, if I'm using chicken, I might throw in another chipotle en adobo. Both Joe and I could've used a little more heat. I added about a pound of chicken and shredded it at the end since Joe likes his meat, but this is originally a meatless meal. I opted for serving it in bowls with cornbread instead of over rice.

Spicy Crockpot Beans
source: The Way the Cookie Crumbles

Ingredients
2 (15-ounce) cans kidney beans, drained and rinsed
2 (4-ounce) cans green chile, diced
2 chipotle chiles from adobo sauce, minced
1 (0.85 ounce) package chicken gravy mix
½ teaspoon sugar
2 tomatoes, chopped, or ½ (14.5 ounce) can diced tomatoes
2 cups cooked white rice

Instructions
Add first five ingredients to crockpot and cook on low for 3-5 hours. Stir in tomatoes 30 minutes before serving. Serve over white rice. (If you use chicken pieces as well, add them skin side down on the bottom of the pot and cook for 6-8 hours.)

He Thinks My Cornbread's Sexy


When I asked Joe yesterday if he wanted rice or cornbread with dinner, he immediately sprung for the cornbread. As I was preparing the cornbread and my cast iron frying pan, Joe was on the phone on the other side of the house. Somehow I got the Kenny Chesney song "She thinks my tractor's sexy" stuck in my head, but I changed the words to be "He thinks my cast iron frying pan's sexy" which doesn't scan correctly at all. Sure enough, when I took this gorgeous cornbread out of the oven, Joe walked in the room and said, "Now that is some sexy cornbread."

This cornbread was perfectly moist with that brown crust on the bottom and sides from the frying pan and not too sweet. It was absolutely delicious, so much so that Joe and I ate half the pan between us. I couldn't stop going back for more! I may see if I can reduce the butter a bit next time, as the idea of eating that much of a stick of butter makes me a little nervous. There's also always the option of throwing some cheese, green chiles, or chopped up jalapenos in.

All-Purpose Cornbread
source: Cooks Illustrated via Reading, 'Riting, and Recipes

1 1/2 cups unbleached all-purpose flour
1 cup yellow cornmeal (this dish was tested using Quaker yellow cornmeal)
2 teaspoons baking powder
3/4 teaspoon table salt
1/4 teaspoon baking soda
1/4 cup packed light brown sugar
3/4 cup frozen corn kernels, thawed
1 cup buttermilk
2 large eggs
8 tablespoons (1 stick) unsalted butter, melted and cooled slightly

1. Adjust oven rack to middle position; heat oven to 400 degrees. Spray 8-inch square baking dish with nonstick cooking spray. Note: To make this in a cast iron skillet, place approx 1 Tbs of butter in the skillet and place it in the oven while preheating. Whisk flour, cornmeal, baking powder, baking soda, and salt in medium bowl until combined; set aside.

2. In food processor or blender, process sugar, thawed corn kernels, and buttermilk until combined, about 5 seconds. Add eggs and process until well combined (corn lumps will remain), about 5 seconds longer.

3. Using rubber spatula, make well in center of dry ingredients; pour wet ingredients into well. Begin folding dry ingredients into wet, giving mixture only a few turns to barely combine; add melted butter and continue folding until dry ingredients are just moistened.

4. Pour batter into prepared baking dish; smooth surface with rubber spatula. Note: If using cast iron skillet, remove from oven and turn pan to coat all surfaces with the melted butter. Pour the batter into the hot pan. Bake until deep golden brown and toothpick inserted in center comes out clean, 25 to 35 minutes. (I just kept an eye on it until it looked done.) Cool on wire rack in the pan for 10 minutes; invert cornbread onto wire rack, then turn right side up and continue to cool.

Saturday, November 29, 2008

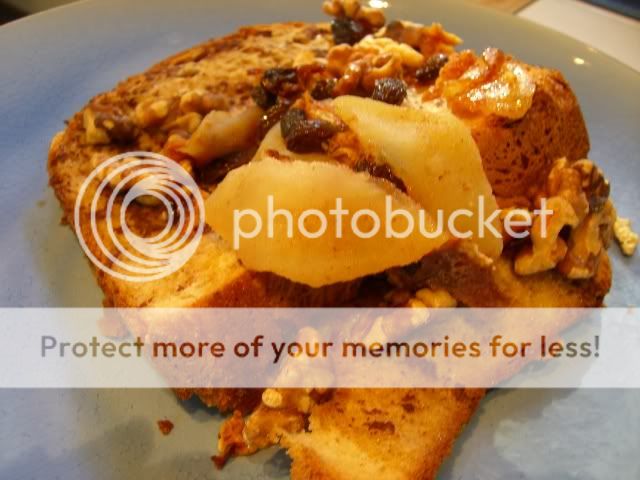
French Toast Casserole

As I've mentioned before, because Joe's schedule is so crazy, we've developed ways of really cherishing the time that we get to spend together. And when we both have the day off, I let him sleep in, and then we have a nice breakfast. For a long time, this meant breakfast tacos, but I'm trying to branch out a little.

I was flipping through the cookbooks I have, but nothing was catching my eye until I saw this. Not to mention that I had all of the ingredients on hand: I just had to make some bread the day before. You can prep it the night before, then all you have to do is stick it in the oven. I prepped it that morning, and after I put it in the oven, I hopped right back in our warm bed with the cats! We knew it was time to get up when the cinnamon came wafting into our bedroom from the kitchen. What a low-stress breakfast!

Those was just enough for the two of us, and I found myself wishing I had a little bacon or sausage alongside it.

French Toast Casserole
source: The Little Big Book of Comfort Food

Ingredients
1/4 cup packed brown sugar
2 tbsp melted butter
1 tsp cinnamon, divided
1 apple, peeled, cored, and sliced
2 tbsp raisins
1/3 of a 1 lb loaf of French bread, sliced
2 eggs, beaten
1/2 cup milk
1 tsp vanilla extract
1/4 cup chopped pecans (I used walnuts.)

Directions
  1. Mix together the brown sugar, the melted butter, and 1/4 tsp of the cinnamon. Add the apple slices and raisins; stir to coat. Pour into a greased baking dish. Arrange the bread slices in an even layer over the apple-raisin mixture.
  2. Whisk together the eggs, milk, vanilla, and remaining cinnamon. Pour over the bread, covering it evenly so that all slices are soaking in the liquid. Top with chopped pecans. Cover with aluminum foil and refrigerate overnight.
  3. Preheat the oven to 375 degrees. Remove the dish from the refrigerator while the oven heats. Bake, covered, for 40 minutes. Remove the cover and bake for an additional 5 minutes. Let stand 5 minutes before serving.

Friday, November 28, 2008

Chocolate Bourbon Pecan Pie


Poor Joe has been practically begging me to make a pecan pie ever since this summer, but it just didn't feel quite right in the summer heat to be eating pecan pie. And, to be fair, I'm not that big of a fan of regular pecan pie. Because I know how many calories are in it, I've found that it isn't really worth it on most occasions.

But this, this is different. I knew Joe would go for the bourbon flavor, and I liked the addition of the chocolate. I altered the amounts and the method based on the comments and reviews of the recipe, and those changes are reflected below. Joe said he would've liked a stronger bourbon flavor, but since I didn't know how our other guests would feel about it, I reduced it.

This pie will knock your socks off. You will find yourself returning again and again to the pie plate wondering who ate all of the pie until you realize that it was you. The chocolate is marvelously gooey, and the pie has that great caramelized crunchy top. If you make this pie, everyone will love you!


Chocolate Bourbon Pecan Pie
source: Allrecipes

Ingredients
  • 1 (9 inch) deep-dish pie shell
  • 3/4 cup white sugar
  • 1 cup light corn syrup
  • 1/2 cup butter
  • 4 eggs, beaten
  • 2 tbsp bourbon (If you prefer a stronger bourbon flavor, the original recipe calls for 1/4 cup)
  • 1 teaspoon vanilla extract
  • 1/4 teaspoon salt
  • 6 ounces semisweet chocolate chips (I didn't measure, just covered the bottom.)
  • 1 cup chopped pecans
Preparation
  1. Preheat oven to 325 degrees F (165 degrees F).
  2. In a small saucepan combine sugar, corn syrup, and butter or margarine. Cook over medium heat, stirring constantly, until butter or margarine melts and sugar dissolves. Cool slightly.
  3. In a large bowl combine eggs, bourbon, vanilla, and salt. Mix well. Slowly pour sugar mixture into egg mixture, whisking constantly. Stir in pecans. Create a layer of chocolate chips on the bottom of the pie shell and pour mixture over the chocolate chips, into pie shell.
  4. Bake in preheated oven for 50 to 55 minutes, or until set and golden. May be served warm or chilled.

Wednesday, November 26, 2008

Happy Thanksgiving!

I have so much to be thankful for this year that I hardly know where to begin. First of all, being married to the most wonderful, intelligent, funny man I've ever met is a huge blessing. This year could've been a lot harder for both of us but getting to share the burden makes it easier.

And our wonderful ragdolls, Duke Ellington and Thelonious Monk, are always a blessing and a reminder that life is so fun.
We are so blessed to live in a city that we love, especially since a year ago, we didn't know where we would end up. We've discovered that we like to be outdoors and do things like hike!
I can't believe that I am finally in school to do what I've felt called to do since I was 16, and I love it even more than I thought I would.
It's also been great to live within a half hour of my parents for the first time since I left for boarding school my junior year of high school.
There's so much that we're thankful for: Joe's job, a roof over our heads, a church that truly shows the all-encompassing love of Christ, flexible bishops in Texas and Tennessee, our health and that of our parents.

So after running the Habitrot 5K tomorrow morning, we're having dinner at my parents' house with four guests. Below is our menu!

Thanksgiving Menu

Appetizers:
Baked Brie with Carr's Water Crackers
Sausage and Cheese with Triscuits

Meat:
Turkey breast
Ham

Sides:
Cranberry salad
Vermont Cheddar Mashed Yukon Golds
Turkey Gravy
Cornbread and Sausage Stuffing
Sizzled Green Beans with Crispy Prosciutto and Pine Nuts
Rolls

Dessert:
Apple Pie
Pumpkin Pie
Chocolate Bourbon Pecan Pie

Have a very happy Thanksgiving!

Monday, November 24, 2008

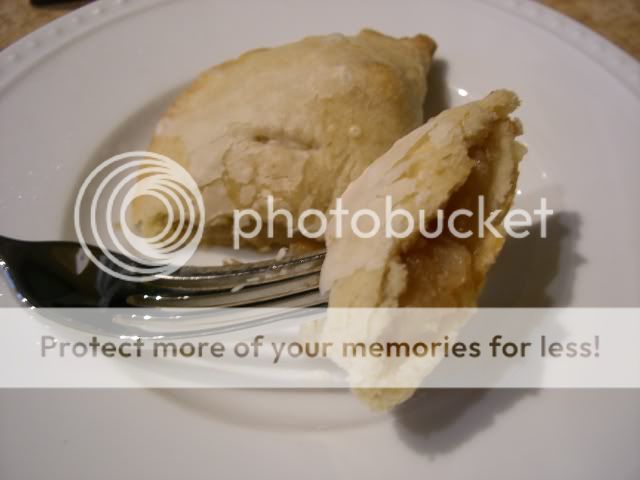
Crispy Apple Turnovers


Apparently there's a first time for everything. Yesterday afternoon, I rolled up my sleeves and set out to make my very first pastry crust. I was nervous, but I persevered. And now I have little apple turnovers as a result. This was pretty time-intensive because there are quite a few parts, but if you're more experienced at making the pastry dough, it shouldn't take that long.

When Joe walked into the kitchen last night, he said, "It smells like the holidays in here." The smell of cinnamon and apples was wonderful. The filling for these was relatively simple, but it had the perfect consistency. I stole the idea of making them mini-turnovers from Stephanie, and they're absolutely adorable.

I had been thinking about making these for a while, but when I got these little things that create perfect little dough pockets for empanadas or turnovers from a gift exchange, I knew exactly how I would use them.

Look how nicely they look all lined up!

I would recommend dipping the tops in the glaze rather than drizzling. You would probably get a more uniform look that way.

Crispy Apple Turnovers
source: Macaroni and Cheesecake

Ingredients:
Filling:
1 ¾ C pared, chopped tart apples
1/3 C water
1/3 C packed brown sugar
¼ tsp ground cinnamon
1/8 tsp ground nutmeg
1 tbsp all purpose flour
1 tsp sugar
1 tbsp butter or margarine

Pastry:
2 C all purpose flour
2 tbsp sugar
1 tsp salt
¾ cup shortening, chilled
5 tbsp ice water

Glaze:
½ powdered sugar
1 tbsp milk
¼ tsp vanilla

For filling:
Combine apples and water in small saucepan. Cook on high heat until mixture comes to boil. Stir frequently.Reduce heat to low. Simmer 5 minutes.Stir in brown sugar, cinnamon and nutmeg. Simmer 5 minutes. Stir frequently.Combine 1 tablespoon flour and 1 teaspoon granulated sugar. Stir into apple mixture.Bring to boil. Boil one minute. Stir in butter.

For pastry:
Combine 2 cups flour, 2 tablespoons sugar and salt in medium bowl. Cut in cold all-vegetable shortening using pastry blender (or 2 knives) until all flour is blended in to form pea-size chunks. Sprinkle 5 tablespoons ice-cold water, one tablespoon at a time. Toss lightly with fork until dough forms ball. Flour rolling surface and pin lightly.Divide dough in half. Roll each half to 1/16 inch thickness. Use lid from 3 pound Crisco All-Vegetable Shortening can as pattern. Cut 6 circles (5-1/4 inches) from each half. (Reroll as necessary.) ( I cut them in about 3 in. circles using a cup I had at home)

Place about one tablespoon of apple filling on each dough circle. Moisten edges with water. Fold in half over filling. Press with fork to seal.Place on baking sheet on parchment paper. Prick tops with fork. Bake at 425ºF about 20 minutes or until golden brown. Cool 10 minutes on wire rack.

For glaze:
Combine powdered sugar, milk and vanilla in small bowl. Stir well. Drizzle over turnovers. Serve warm or cool.

Saturday, November 22, 2008

Viognier and Spaghetti Carbonara


Last March, Joe and I took a weekend trip to Fredericksburg, TX where we stayed in a wonderful little B&B and spent most of Saturday going to nearby wineries on the Texas Wine Trail. Now, neither Joe nor I are big wine snobs, but I was prepared to be slightly underwhelmed and that was not the case at all. We had a wonderful time and fell in love with several wines, but none could compare to the Becker Vineyards Viognier. This is even more notable because both Joe and I prefer red wines. Above is a picture of the tasting room at Becker Vineyards. They also have a B&B on the property. We sat out on the porch with our glasses of wine, enjoyed the gorgeous weather, and listened to the live music they had.

When we returned to Houston after our trip, we were pleased to discover that the Viognier could be found in our grocery store, and so we took its presence for granted. Then we moved to Tennessee, where the Baptists have instituted arcane liquor laws and "sin taxes" (sign up at Red White and Food to lobby to change this), and discovered that, not only was our marvelous Viognier nowhere to be found, but we couldn't even have any shipped to us. So, when Joe's friend came to visit us last month from Houston, our sole request was to have her bring us some Becker Vineyards Viognier.

We've had it sitting in our hot little hands for over a month, and I wanted to drink it on a special night and make a dinner to go with it so we could really savor all of the flavors. I decided on spaghetti carbonara with steamed broccoli and focaccia. Sure enough, after blessing the food and clinking glasses, the first thing Joe and I did was stick our noses in our wineglasses and then take a big sip of the viognier. Oh, and the pasta was really good too. Joe said, "Why even bother to go out when we can eat like this at home and have wonderful wine?" I'm highly inclined to agree.

Spaghetti Carbonara
(source: The Pioneer Woman Cooks)

Ingredients
1 lb spaghetti or other thin pasta
4 eggs
1 lb bacon
1 1/2 cups parmesan cheese
8-12 cloves of garlic, sliced or chopped (Mine were enormous, so I only used 4.)
1 large onion, chopped
1 cup chicken stock
1 cup white wine (I didn't want to cook with our precious viognier, so I used 1/2 cup chicken stock and 1/2 cup dry vermouth.)
1/2 stick of butter
1 handful of parsley
1-2 tbsp fresh ground black pepper

Preparation

First, slice up the bacon in to pieces about an inch thick. Then toss them into a heated stainless steel pan (I used my cast iron pan since all the others are non-stick.) Cook until browned and crisp.

While the bacon cooks, put on water to boil for the pasta and add the pasta once the water has reached a rolling boil and cook to al dente. When the bacon is cooked, remove from the pan with a slotted spoon, leaving the renderings. Cook the chopped onion in the renderings for a few minutes and then add the garlic.

Once the onion and garlic have cooked for a few minutes, remove from the pan with a slotted spoon. Discard the leftover renderings. Place the pan back on high heat until it starts to smoke a little. Then pour in the white wine and deglaze the pan. Add one cup of chicken stock. Return bacon, onion, and garlic to the pan and let simmer over medium heat.

Crack four eggs into a large bowl. Chop up most of the parsley and add it to the bowl along with most of the parmesan cheese. Mix well with a fork.

Drain the water from the pasta and add the very hot pasta to the egg mixture. The heat from the pasta will partially cook the eggs. Then add the bacon mixture and toss to combine. Finally, throw a 1/2 stick of butter in. Pepper to taste. Garnish with parsley and parmesan cheese and serve immediately.

Chocolate-Glazed Pumpkin Cookies


When I saw the picture of these in Sherri's blog, they looked so fluffy and delicious that I knew I had to try them at some point. They are very cake-like, and the hardened chocolate really takes them over the edge. I'll admit I had a lot of fun swirling the chocolate over the cookies. The spice is very subtle, so you can taste the pumpkin nicely. These also look gorgeous. I currently have them stacked up on a covered cake stand, and they look like I bought them from a bakery!

I used a round tbsp to scoop them out, and the dough yielded 20 cookies.

(If you haven't noticed, I recently discovered the food setting on my point-and-shoot digital camera, so my pictures have gotten SO much better, in my opinion.)

Chocolate-Glazed Pumpkin Cookies
(source: yum.)

Ingredients

2 c. flour
1/2 t. soda
1/2 t. baking powder
1/2 t. pumpkin pie spice
1/4 t. salt
1/2 c. butter, softened
1 c. sugar
1 egg
1 c. pumpkin puree
4 oz. semisweet chocolate, chopped

Preparation

Preheat oven to 375.

Whisk dry ingredients together. Set aside. Using an electric mixer, beat butter and sugar until light. Add egg; beat, until smooth. With mixer on low alternately add flour in two parts and pumpkin in one. Beginning and ending with the flour mixture. Do not overmix.

Bake until puffed and golden- about 15 minutes.

When cookies have cooled, melt chocolate either in microwave at 30 second intervals or over double-boiler. Drizzle over cookies and cool in refrigerator until chocolate is set.

Reference: Martha Stewart's Everyday Food magazine.

No-Fuss Focaccia


When I found this recipe, it looked just like the kind of bread recipe I can get behind: absolutely no kneading required. Since we were going to have pasta for dinner, I decided a nice focaccia bread would be nice. Usually, if we want focaccia, we stop buy the Italian cheese store in our neighborhood and pick up some day-old focaccia for cheap, but I decided to try my hand at this since I was home all day. It didn't rise as much as I would've hoped, so next time I might try letting it rise in a warmer location. It's been chilly here, and our old house is kind of drafty. Joe was so impressed that I made this myself, and he couldn't stop munching on it while we were preparing dinner. Of all the optional ingredients, I mixed about 2 tsp of pizza seasoning into the dough and sprinkled it with another 2 tsp or so before baking. Dried rosemary would be a nice touch as well. We ate it with dinner, dipping it in some olive oil with fresh ground pepper.

No-Fuss Focaccia
source: Amber's Delectable Delights


Ingredients


1 1/2 cups (12 ounces) warm water
3 tablespoons (1 1/4 ounces) olive oil (plus additional for drizzling)
1 1/4 teaspoons salt
3 1/2 cups (14 3/4 ounces) King Arthur Unbleached All-Purpose Flour
1 tablespoon instant yeast
4 teaspoons Pizza Dough Flavor, optional
1/4 cup (1 ounce) Vermont cheese powder, optional
Pizza Seasoning, optional

Directions

1) Lightly grease a 9" x 13" pan, and drizzle 1 to 2 tablespoons olive oil in the bottom.
2) Combine all of the ingredients, and beat at high speed with an electric mixer for 60 seconds.
3) Scoop the sticky batter into the prepared pan, cover the pan, and let it rise at room temperature for 60 minutes, till it's become puffy.
4) While the dough is rising, preheat the oven to 375°F.
5) Gently poke the dough all over with your index finger.

6) Drizzle it lightly with olive oil, and sprinkle with pizza seasoning, and/or the dried herbs of your choice, if desired.
7) Bake the bread till it's golden brown, 35 to 40 minutes.

8) Remove it from the oven, wait 5 minutes, then turn it out of the pan onto a rack. Serve warm or at room temperature.

Friday, November 21, 2008

Chicken Tamale Casserole

This was seriously good, definitely a recipe that I will make again. Sometimes it's really nice to have recipes where I can come home, mix stuff together, and then read the mail or talk to Joe while it bakes, and that is exactly what I did last night. Plus, it was pretty chilly yesterday, and neither Joe nor I are quite used to the cold, so this was a good reminder of our time in Texas. And on a chilly day, who doesn't want a casserole or stew or chili?

I chopped up a fresh jalapeno in addition to the green chiles for the cornbread, and next time I might do too. It certainly wasn't bland, but a little more heat would not be unwelcome. I was going to serve this with some sauteed corn and salsa, but I had less corn than I thought. A corn and black bean salad or some pinto beans would go perfectly alongside this.

Chicken Tamale Casserole
(source: Cooking Light via Elizabeth's Edible Experience)
Yield: 8 servings

Ingredients
  • 1 cup (4 ounces) preshredded 4-cheese Mexican blend cheese, divided
  • 1/3 cup fat-free milk
  • 1/4 cup egg substitute (I used one egg.)
  • 1 teaspoon ground cumin
  • 1/8 teaspoon ground red pepper
  • 1 (14 3/4-ounce) can cream-style corn (I used normal corn.)
  • 1 (8.5-ounce) box corn muffin mix (such as Martha White) (Or Jiffy! Joe and I had a long conversation about Jiffy corn muffin mix. It's been around since the '30s!)
  • 1 (4-ounce) can chopped green chiles, drained
  • Cooking spray
  • 1 (10-ounce) can red enchilada sauce (such as Old El Paso)
  • 2 cups shredded cooked chicken breast
  • 1/2 cup fat-free sour cream
Preparation

1. Preheat oven to 400°.

2. Combine 1/4 cup cheese and next 7 ingredients (through chiles) in a large bowl, stirring just until moist. Pour mixture into a 13 x 9–inch baking dish coated with cooking spray.

3. Bake at 400° for 15 minutes or until set. Pierce entire surface liberally with a fork; pour enchilada sauce over top. Top with chicken; sprinkle with remaining 3/4 cup cheese. Bake at 400° for 15 minutes or until cheese melts. Remove from oven; let stand 5 minutes. Cut into 8 pieces; top each serving with 1 tablespoon sour cream.

Calories: 354 (36% from fat)
Fat: 14.1g (sat 7.1g,mono 3.3g,poly 1.2g)
Protein: 18.9g
Carbohydrate: 36.3g
Fiber: 2.5g
Cholesterol: 58mg
Iron: 1.7mg
Sodium: 620mg
Calcium: 179mg