Thursday, May 7, 2009

Roasted Corn and Goat Cheese Quesadillas

Two things I always have in my freezer are corn kernals and peas. My personal belief is that frozen vegetables are seriously underrated, especially since they are flash-frozen at their freshest. For people on a budget who cannot always afford what's in the produce section, frozen vegetables offer a great healthy alternative.

In this recipe, roasting the corn brings out the natural sweetness of the corn by caramelizing the sugars. With the addition of the goat cheese, these quesadillas definitely don't skimp on flavor. I had some tomatillo salsa from Trader Joe's to use up, which was the perfect complement to the quesadillas, offering a light acidity to offset the tanginess of the goat cheese. Plus it came together very quickly! These could also make a delicious appetizer.

Roasted Corn and Goat Cheese Quesadillas with Tomatillo Salsa
source: Cooking Light
Yields 4 quesadillas

Ingredients
1 cup corn kernels, thawed if frozen
2/3 cup (5 oz) goat cheese, softened
8 corn tortillas
1/4 cup green onion, chopped
10 tablespoons bottled salsa verde, divided
cooking spray

Preparation

Heat a nonstick skillet over medium heat. Add corn, sauteeing for several minutes or until brown spots appear. Place corn in a small bowl with goat cheese and combine until well-blended. Divide corn mixture between four tortillas and spread thin, topping with 1 tbsp green onions and 1 1/2 tsp salsa. Top with the remaining four tortillas.

Spray nonstick skillet with cooking spray and heat it over medium heat. Place quesadillas in pan, one at a time, until they are browned on both sides. Remove from pan and keep warm until all quesadillas are cooked. Cut each quesadilla into four wedges and drizzle with remaining salsa.

Tuesday, May 5, 2009

Spicy Shrimp with Garlic Basil Linguine

This was a quick and delicious meal that really hit the spot. I'm a big fan of Trader Joe's products, and their garlic basil linguine in this dish did not disappoint. I love meals that don't use a lot of ingredients but are still very flavorful. With the shrimp and a salad, this was just enough for the two of us.

Spicy Shrimp with Garlic Basil Linguine

Ingredients
8 oz garlic basil linguine
10 oz thawed, peeled, and deveined shrimp
3 cloves garlic, minced
1/4 tsp crushed red pepper
1/4 cup Parmesan cheese
juice of 1/4 lemon
2 tbsp olive oil
salt and pepper to taste

Preparation

Bring 3-4 quarts of salted water to a boil and cook pasta for 4-6 minutes in boiling water.
Drain pasta and toss with 1 tbsp olive oil to coat and keep warm.

Heat 1 tbsp olive oil in a skillet and cook minced garlic until fragrant. Add shrimp and crushed red pepper, cooking until shrimp are pink and opaque.

Add shrimp mixture, Parmesan cheese, and lemon to pasta. Salt and pepper to taste. Serve immediately.

Monday, May 4, 2009

Meyer Lemon Sorbet

After hearing about Meyer lemons and never seeing them, I had concluded they were simply beyond my grasp. All of the foodies on the coasts were going nuts about them, and all I had were the normal yellow lemons. Then last week I was shopping at Publix and spotted them. Shaped like a lemon but colored like an orange. I double-checked the sign...Meyer lemons! I let them be since I had absolutely no plans for them, and I try to stick to my grocery list. But this week, I made a beeline for them, nearly pushing aside the guy restocking the produce on Saturday morning. He saw me reach for them and asked, "Do those taste more like a lemon or more like an orange?" I admitted that I didn't really know from personal experience but that I was going to use them to make SORBET. I don't think he was as excited as I was.

This sorbet is exactly what I crave after dinner -- something sweet but flavorful enough that I don't need a lot of it. In fact, a few spoonfuls of this sorbet satisfies me because the flavor is so unique. It's slightly sour but sweet. It's unlike anything I've ever tasted before. And Joe is crazy about it as well!

Meyer Lemon Sorbet
source: Simply Recipes

Ingredients

1 cup sugar
1 cup water
1 cup Meyer lemon juice (3-4 lemons)
2 tsp zest from lemons

Preparation

1. In a small saucepan on medium high heat, make a simple syrup by heating sugar and water until the sugar has completely dissolved. Remove from heat and let cool. Mix in the lemon juice and zest. Chill, either in the refrigerator, or by placing in a metal bowl over an ice bath.

2. Once the mixture has thoroughly chilled, freeze in your ice cream maker according to the manufacturer's instructions. If you don't have an ice cream maker, you can pour the mixture into a shallow pan and freeze in your freezer until semi-solid. Then take a fork and fluff it up, returning it the the freezer to freeze firm. Then put in a food-processor or blender to process until smooth.
Place sorbet in an airtight container and freeze until ready to serve.

3. Scoop out preferably with a melon-baller. Garnish with mint. Makes 2 1/2 cups.

Saturday, May 2, 2009

Thai Peanut Turkey Burgers

I've never been very adventurous when it comes to turkey burgers. I remember thinking how exotic it was when Joe added apple and celery to his one time. But when I saw this recipe at Cara's Cravings, I knew it would be a big hit with both of us since it included extra veggies in the patty and a lot of flavors that we like. In fact, Joe asked me about halfway through his burger, "You only made two patties?" and then he tried to swipe the remaining few bites of mine!

Thai Peanut Turkey Burgers


Ingredients

8oz ground turkey
1 medium carrot, shredded
1 large scallion, minced
1/4 tsp sesame oil
1 tsp chili garlic sauce
2 tbsp natural peanut butter
freshly ground salt & pepper
1/2 tsp ground ginger

2 tbsp light mayonnaise
handful of cilantro, finely minced (I omitted since I had no cilantro on hand.)
1-2 tsp chili garlic sauce

hamburger buns of your choice
mixed greens

Combine burger ingredients a mixing bowl and combine thoroughly. Heat a skillet over medium-high heat. (I cooked mine on our George Foreman.) Form the turkey mixture into two patties. Cook for about 7-10 minutes per side, until cooked through. Serve on buns with cilantro-chili mayo and greens.

Friday, May 1, 2009

Oatmeal Breakfast Clafoutis

After reading these posts on Casual Kitchen this week, I was determined to present Joe with some other breakfast options besides a travel coffee mug full of cereal. He doesn't like the texture of oatmeal, but I asked him if this idea seemed appealing and got the okay. Because he usually eats breakfast in the car, it needs to be portable and quick. This recipe is a good idea for him because it's endlessly customizable and contains lots of healthy, filling ingredients.


I now have prepared bars of clafoutis wrapped in plastic wrap in the freezer ready to go. So he can take one out the night before and let it thaw in the refrigerator, and before he heads out the door, he can just give it a 30-second zap in the microwave. And if he doesn't like these, I'll just eat them! They sure did smell delicious baking in the oven.


Oatmeal Breakfast Clafoutis

source: Chocolate and Zucchini

Serves 8


Ingredients

- 2-1/4 C quick cooking oats, uncooked, or 2-3/4 C old fashioned oats, uncooked

- 2/3 C brown sugar

- 3/4 C raisins and/or dried cranberries (substitute other dried fruits)

- 1 apple, peeled and sliced (substitute other fresh fruits - optional)

- 1/4 to 1/3 C nuts, chopped (walnuts, almonds, sunflower seeds, hazelnuts..., or even better a mix of all - optional)

- 1 tsp ground cinnamon

- 1/2 tsp salt

- 3-1/3 C milk

- 2 eggs, lightly beaten

- 1 Tbsp vanilla extract

Preheat your oven to 180°C (360°F). Lightly oil an 13 by 9-inch baking dish.


In a large bowl, combine the oats, sugar, raisins, chopped nuts, cinnamon and salt. Mix well. In a medium bowl, combine the milk, eggs and vanilla. Mix well. Add this to the dry ingredients, and mix until well blended. (The mixture will be VERY thin.)


Pour the mixture into the baking dish, and use a wooden spoon to make sure the solids are more or less evenly spread out. Arrange the apple slices over the surface. They will sink somewhat but that's okay, they'll float right back up when the oatmeal cooks.


Put in the oven to bake for 55 to 60 minutes, until the center is set and firm to the touch. Let cool slightly: it should be eaten a bit warm but not scalding hot.


Cut in 8 servings, and serve with yogurt and fruit if desired; it is also nice with a thin spread of jam or peanut butter. Store the leftovers in the refrigerator, tightly covered, or wrap each serving individually and put in the freezer. You can then take a serving out the night before and leave it to thaw until the morning, when a 30-second stay in the microwave will bring it to the perfect temperature.
Original recipe by Quaker Oats.

Thursday, April 30, 2009

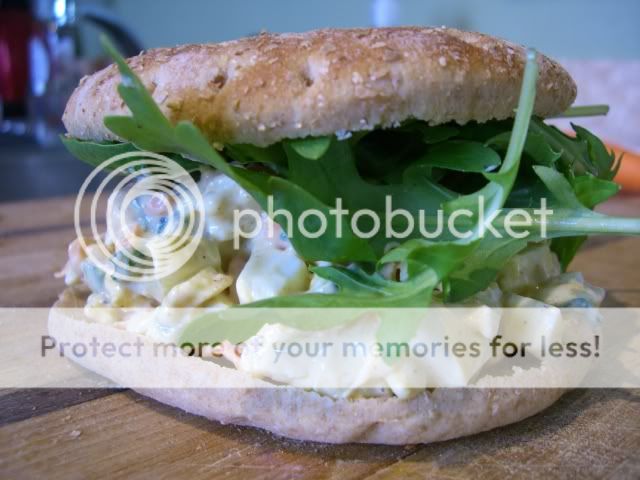
Curried Egg Salad

When I was in elementary school, there was this one boy who we all ruthlessly made fun of because he brought egg salad sandwiches for lunch, and egg salad was WEIRD to the rest of us with our Lunchables and PB&J sandwiches. So, imagine my shock when a few years later I discovered that I really liked egg salad. I still feel guilty for making fun of that kid all the time.

I woke up Wednesday morning and realized I had nothing to take to work for lunch. After doing an inventory of the refrigerator, freezer, and pantry, I was still at a loss. Then I went through my saved recipes and discovered this egg salad recipe that I had saved back in December. I third-ed the original recipe, which made just enough for sandwiches for the rest of the week. I also added grated carrots. Next time I would lessen the amount of mayonnaise because the carrots added some extra moisture, and the salad was a little gloppier than I would've preferred today.


Curried Egg Salad
adapted from Cate's Kitchen

Ingredients

4 hard-boiled eggs, peeled and coarsely chopped
1/4 cup minced scallions
1/4 cup grated carrot
3-4 tbsp light mayonnaise
1/2 tsp curry powder
salt and pepper to taste

Combine all ingredients in a medium bowl. Add salt and pepper to taste.

Tuesday, April 28, 2009

South of the Border Stuffed Peppers

I'm completely aware that I just made stuffed peppers, but I had the rest of a bag of bell peppers to use up (which was cheaper than just buying the ones I specifically needed) when this popped up on my friend Melissa's blog. Besides the bell peppers, this was pretty pantry-friendly for me, and, like my dad, I don't think Joe ever gets tired of Mexican flavors.

These do take a little bit of time, but you could probably prepare the filling and stuff the peppers ahead of time. Or you can make extra and freeze it. I also love the little self-contained portions which definitely kept me from going back for more because they were so good.

South of the Border Stuffed Peppers
source: Mrs Sac's Purple Kitchen

Ingredients
1/2 lb ground turkey
3-4 large bell peppers, seeded/cored (If you don't have that many peppers, you can always eat the leftover filling in a tortilla with a little cheese.)
2 cloves garlic, minced
1/3 cup onion, finely chopped
1 cup cooked brown rice
1 cup fresh salsa
1/2 tsp cumin
1/2 tsp Mexican chili powder
1/2 tsp Adobo powder
salt and pepper to taste
1/4 tsp paprika
1/2-1/3 cup tomato sauce
1/2 can (3/4-1 cup) black beans, rinsed & drained
water
2% shredded Mexican blend cheese

Preparation
Preheat the oven to 350. Prepare rice according to directions, drain and set aside.

Meanwhile heat a large skillet over medium heat, add the turkey. While turkey is still browning, add in the onions and garlic and continue to cook till meat is browned and onions and garlic is softened and drain.

Return turkey mixture to skillet. Add in ingredients from cumin through paprika and 2 tbsp of water, stirring to coat. Add in the salsa, tomato sauce, beans and rice and heat through.

In a baking dish pour in a little tomato sauce and water to lightly coat the bottom and provide moisture. Fill in the peppers and place in dish. Add a couple of tablespoons of cheese on top and cover with tin foil.

After 30 minutes, remove foil and spoon juices over the peppers. Bake another 15-20 minutes, add a little more cheese on top if desired and bake another 5 minutes or so until melted.

Maple and Walnut Quick Bread

My Cooking Light magazines have a terrible habit of arriving in the mail right during my most hectic times at school when I should be studying instead of perusing magazines. This month was no exception, though it was an exceptional issue. I found myself flagging tons of recipes. All the food looked so seasonal and fresh and light. Plus a lot of it used ingredients I have on hand or know where to get.

I was up early Sunday morning before church with little to no appetite for anything in the house when I remembered this quick bread recipe in the Cooking Light issue so I whipped it up for later. I'm a sucker for quick breads but they often have quite a bit of oil and sugar in them. Without any walnut oil, I substituted applesauce, though I would definitely recommend the walnut oil.

The flavor in this loaf is very subtle, and I would say that the maple flavor develops better the next day. The crunchiness of the walnuts on top add a great textural balance to the chewy loaf. This was featured in a spread about healthy fats and noted that walnuts are a great source of poly-unsaturated fats. Plus they taste delicious!

Maple and Walnut Quick Bread
source: May 2009 issue

Ingredients
1 1/4 cup all-purpose flour
3/4 cup whole-wheat flour
1/2 cup sugar
2 tsp baking powder
1/2 tsp baking soda
1/2 tsp salt
1 cup low-fat buttermik
1/3 cup maple syrup
1/4 cup walnut oil
1 large egg
1/2 tsp vanilla extract
Cooking spray
1/3 cup finely chopped walnuts, toasted

Preparation
  1. Preheat oven to 350-degrees and grease an 8x4 inch loaf pan.
  2. Combine flours, sugar, baking powder, baking soda, and salt in a large bowl.
  3. Combine buttermilk, syrup, oil, and egg in a separate bowl.
  4. Making a well in the center of the dry mixture, pour the wet mixture into the center of the dry mixture, stirring just until moist. Stir in vanilla.
  5. Spoon batter into the loaf pan and sprinkle with walnuts.
  6. Bake at 350-degrees for 50 minutes or until a toothpick inserted in the center comes out clean. Cool in pan for 10 minutes on a wire rack; remove from pan. Cool completely on wire rack.
Yield: 1 loaf, serving size: 1 slice
Calories 178; Fat 6.5 g (sat 0.8g, mono 1.4g, poly 3.9g); Protein 3.6 g; Carb 27.5 g; Fiber 1.3 g; Chol 16 mg; Iron 1.1 mg; Sodium 224 mg; Calc 73 mg

Monday, April 27, 2009

Black Bean and Rice Stuffed Poblanos

Somehow the weather went straight from winter to summer, with spring being a few weeks of tornado-generating thunderstorms. After my exam on Thursday, I decided what would really make me happy would be to eat dinner out on our deck for the first time this season. And this meal fit the bill perfectly for the occasion.

It's a great light meal with a lot of flavor that is still filling. Joe helped me out in the kitchen by holding open the peppers for stuffing and putting together the salad. However, he neglected to remove the seeds and membrane from the jalapeno, so that was one HOT salad! I made a few changes and omissions based on what I did and didn't have in my kitchen, and Joe, who pretends he doesn't know anything about cooking, suggested I added a little cilantro to the salad next time and use lime juice instead of lemon. Little did he know that those things were actually in the original recipe!

This really came together pretty quickly for such a nice meal. I had dinner on the table within an hour without anything being prepped beforehand. We had quite a bit of stuffing leftover, but Joe quickly claimed the two leftover pepper halves and the stuffing to have with some tortillas and salsa while on-call at the hospital. He rarely likes leftovers, so this must've been a hit!

Black Bean and Rice Stuffed Poblanos with Creamy Corn and Avocado Salad
source: Ashlee's A Year in the Kitchen

Ingredients
Poblanos:
4 poblanos, 3 sliced lengthwise and gutted, 1 diced
3/4 red onion, diced
2 cloves garlic, minced
1 12 oz. can diced tomatoes (I used a 10 oz can of Ro-Tel)
1 c. chicken stock (I used veggie stock)
1 c. quick cooking rice
2 tsp. cumin
1 tsp. chili powder
Dash of hot sauce
Salt and pepper
1 can black beans, drained (I used 2 cups of soaked and cooked dry beans.)
1 c. shredded cheddar cheese

Corn Salad:
1 c. frozen corn kernels, defrosted but cold
1 avocado, diced
1/4 red onion, minced
1 tbsp. minced cilantro (I omitted)
1/4 jalapeno, minced
Juice of 1 lime (I used lemon juice.)
Salt and pepper

Preheat oven to 400.
Place 3 of the peppers in a baking dish, put in the oven while you prepare rice.
In a pot over medium heat, add 1 tbsp. EVOO, red onion, garlic, 1 diced poblano, salt and pepper. Saute vegetables for a few minutes, until slightly softened.
Add tomatoes, stock, spices, and bring to a boil.
Add rice, stir, bring back to a boil, cover, turn to low and simmer 15 minutes, or until rice is cooked.
Stir in black beans.
Take poblanos out of the oven, spoon beans and rice mixture into pepper cups, top with cheddar cheese, place back in the oven and cook for another 15 minutes, or until cheese is melted and peppers are soft.

To make corn salad:
Add corn, red onion, cilantro, jalapeno, lime juice, salt and pepper to a bowl. Mix well.
Add avocado, gently fold in avocado, do not break it up too much.
Keep chilled until serving.

Tuesday, April 21, 2009

Hot Cross Buns

I didn't get around to making hot cross buns for Western Easter but since one of my fellow classmates is Orthodox, I figured they were appropriate for the day after Orthodox Easter as a treat for my Greek class.

My first memory of hot cross buns is having them after the Easter Vigil service at the large Episcopal Church I grew up in. Episcopalians really know how to eat (and drink!), and the reception after Easter Vigil always had the best food: lots of Brie and other cheeses and crackers, etc. And, of course, hot cross buns.

I had a little bit of trouble with the recipe. The dough ended up really sticky, and I had to keep kneading flour into it, though I don't think I kneaded in enough. I also seem to have problems making food look pretty. My hot cross buns are terribly misshapen. Next time I make them, I will add vanilla extract or orange zest to the dough. The dough is sweet but not too sweet. In fact, it reminds me of things I've had from Asian bakeries with a very subtle hint of sweetness. I used raisins but you can use currants or candied fruit.

Hot Cross Buns
source: All Recipes

Ingredients:

Dough:
  • 3/4 cup warm water
  • 3 tbsp butter
  • 1 tablespoon instant powdered milk
  • 1/4 cup white sugar
  • 3/8 teaspoon salt
  • 1 egg
  • 1 egg white
  • 3 cups all-purpose flour
  • 1 tablespoon active dry yeast
  • 3/4 cup raisins
  • 1 teaspoon ground cinnamon
Topping:
  • 1 egg yolk
  • 2 tablespoons water
  • 1/2 cup confectioners' sugar
  • 1/4 teaspoon vanilla extract
  • 2 teaspoons milk
Preparation:
  1. Put warm water, butter, skim milk powder, 1/4 cup sugar, salt, egg, egg white, flour, and yeast in bread maker and start on dough program.
  2. When 5 minutes of kneading are left, add currants and cinnamon. Leave in machine till double.
  3. Punch down on floured surface, cover, and let rest 10 minutes.
  4. Shape into 12 balls and place in a greased 9 x 12 inch pan. Cover and let rise in a warm place till double, about 35-40 minutes.
  5. Mix egg yolk and 2 tablespoons water. Brush on balls.
  6. Bake at 375 degrees F (190 degrees C) for 20 minutes. Remove from pan immediately and cool on wire rack.
  7. To make crosses: mix together confectioners' sugar, vanilla, and milk. Brush an X on each cooled bun.